Wednesday, December 30, 2009

Lookie what I got!!

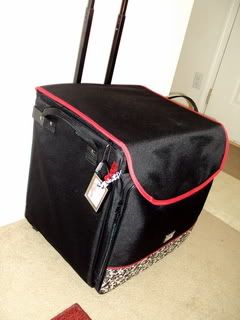
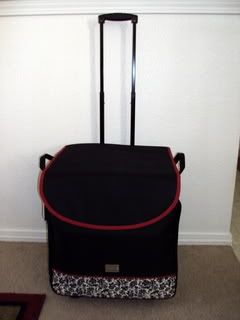
So, after scrapbooking for almost seven years, I FINALLY got the Crop-N-Style XXL Rolling Tote! Yippee!!

I WAS using this rolling tool box from Wal-Mart. It worked really well, but didn't hold my albums or paper, so I had to have a second, smaller rolling tote. What I REALLY wanted was ONE thing to carry all of my scrap crap in, lol. (I hate making multiple trips to the car during a crop! I need all the time I can get to CREATE! Not carry luggage!) :)

So this is what I have now and I LOVE it!
Photobucket

Photobucket

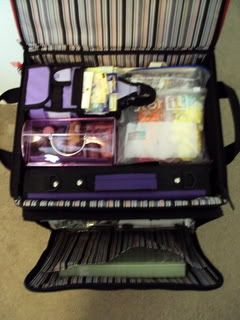
Look at all it holds!
Photobucket

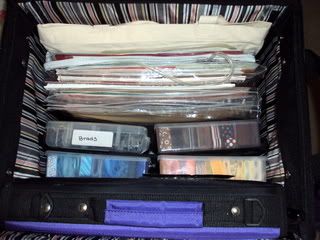
Take the container of Stickles, the bag of paper flowers and the mini tote of bling out to reveal the second layer of scrapbook-y goodness:
Photobucket

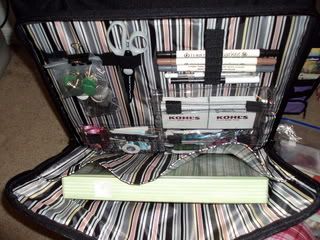
It even has a front zippered pocket to hold MORE stuff!
Photobucket

Yes, those are old cardboard jewelry boxes from Kohl's. They contain buttons and some large rhinestones. :)
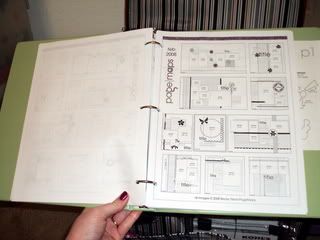
(The green binder holds layout sketches, mostly from PageMaps.com, but also from various magazines.)
Photobucket

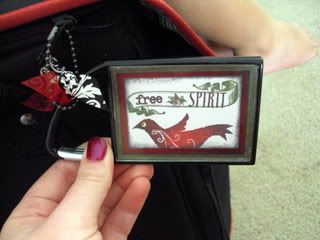
I even made a cute little luggage tag for it with my business card on the back (in case I ever loose it, lol!)
Photobucket


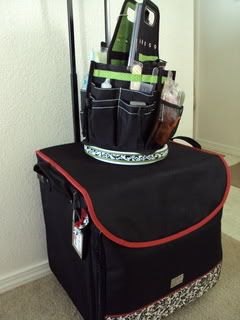
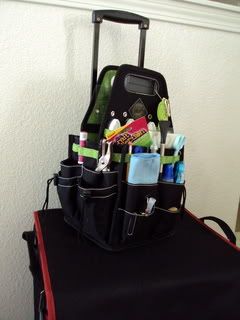
And that's not all! I also bought a Tote-Ally Cool Tote for all my tools! (You can buy one for yourself at Capture!)
Photobucket

The only sad thing was that I couldn't for the life of me find a spinner thingy to go on the bottom. I HAVE to have it spin around or I'll drive myself crazy at crops. Soooooo.....I bought a 9" lazy susan from LazySusans.com and decorated the side of it to match both my tool tote AND my rolling tote! (Yes, I am that big of a dork!)
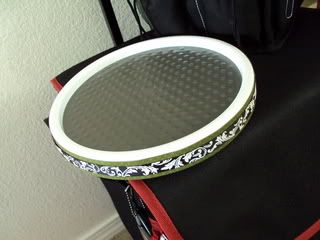
Photobucket

Here it is "in action":
Photobucket

And the great part about it is that it fits right down in the largest part of my tool tote!
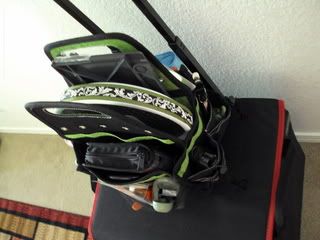
Photobucket

I LOVE organization!!!

Now I'm all ready to "scrap in style" this Saturday at Capture's all day crop!
Saturday, December 26, 2009

Capture events next weekend: All Day Crop & Distressed Card Class

I hope everyone had a great Christmas! We sure did! It was very relaxing. :)

If you're looking for some down time...maybe you need to get away...maybe you need time to work on Holiday layouts....then join me this coming weekend at Capture for an All Day Crop and a Distressed Card Class!

The All Day Crop will be Jan. 2nd from 10am-10pm. The cost is $30 and includes lunch, snacks, dinner and prizes! It's a great way to catch up on projects and hang out with friends!


Photobucket
Want to learn some distressing techniques and use our new Smooch Glitter Spray? Then join me on Sunday, Jan 3rd from 1-3pm for our Distressed Card Class! The cost is $15 for 4 cards. Space for both events is limited, so call to reserve your spot today!

Phone:(970) 484-0595
email: info@shopcapture.com

Tuesday, December 22, 2009

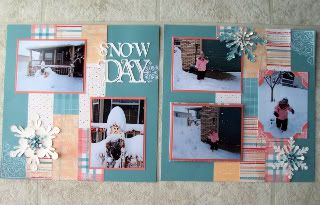
"Snow Day"

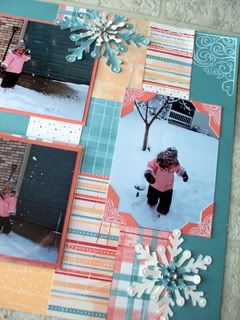
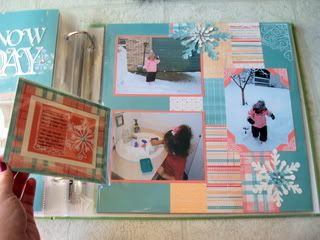
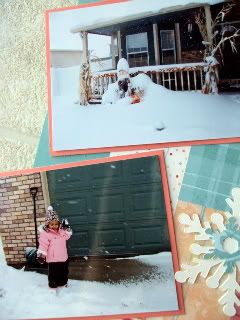
I finally completed the layout I started at the last crop I went to! Unfortunately you can barely make out the details in these pics. :(

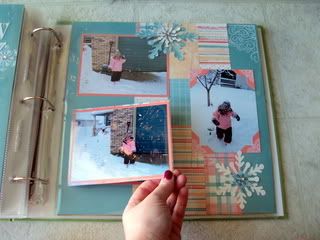
Here is the layout:
Photobucket

Side note: These pics were taken days before HALLOWEEN! (Hence the scarecrow covered in snow). Crazy weather huh? And 2 days later it was all melted away. That's Colorado for ya! ;)

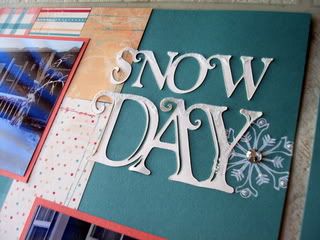
This pic is SUPPOSED to show the "snow" on the top of the title. I mixed Close To My Heart's (CTMH) Prisma Glitter with some Fun Flock and sprinkled it over the glue I put down on the tops of the letters. It looks WAY better in person.

Photobucket
The white rub-ons are also from CTMH. 

Photobucket

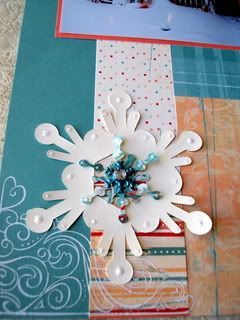
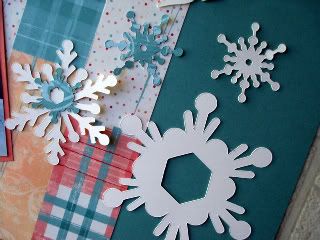
I 'painted' some Glossy Accents on all of the snowflakes but you can't tell in these pics. I also added Stickles in "Diamond" to the edges, and put a silver rhinestone in the middle.

Photobucket

Now, this is the cool part: I wanted to include a pic of Caroline after she came inside. She was SO cold outside (we only stayed out there for about 5 minutes) but she still wanted to play in the snow. So we brought some snow inside and put it in the bathroom sink. :) That kept her busy and quiet for about 30 minutes! Woo-Hoo!

Anyway, the pic I took didn't really fit with my layout, so I hid it under another pic by placing the top pic in a clear bag with adhesive on the strip! You can find a similar item called Flip Flaps at CTMH.(Place the clear flap on the outside of the page protector, instead of directly on your layout, so people can flip it up as they look through your album.)
Photobucket

Photobucket

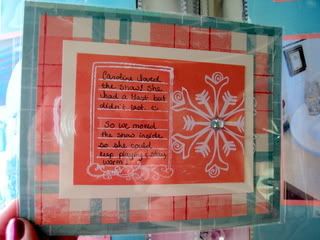
Close up of the journaling:
"Caroline loved the snow! She had a blast but didn't last.:) So we moved the snow inside so she could keep playing and stay warm!"
Photobucket

Saturday, December 19, 2009

What I did at last night's crop

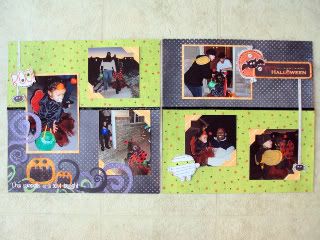
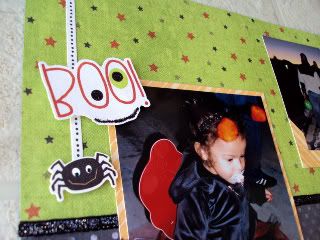
So, I didn't get quite as much done as I wanted to at the crop last night, but I did get Halloween all done! (a 2 page layout)

And I started on another 2 pg. layout. I just have to put the finishing touches on it. :)

Here is the Halloween layout:

Photobucket

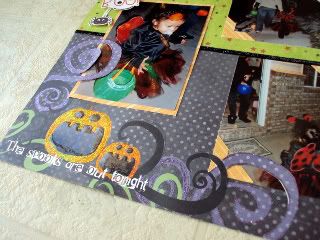
Some of the details:

I cut part of the swirls on the paper with an exacto knife so that I could slide the picture underneath. I added some purple Stickles to them("Grape" to be exact). I also stickled the pumpkins and added Glossy Accents.

Photobucket

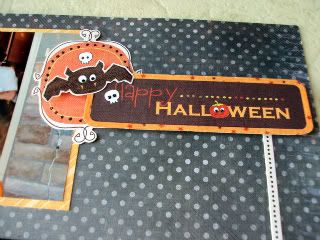
I put some foam squares under some of my embellishments. It's funny, I used to use foam squared and pop dots ALL the time when I first started scrapbooking (almost 7 years ago). Then they sort of went out of style. Now I use them all the time again. Same with some of the decorative scissors! Funny how things come back "in style" in the scrapbooking world, just like they do in the fashion world! ;-)

Photobucket

Photobucket

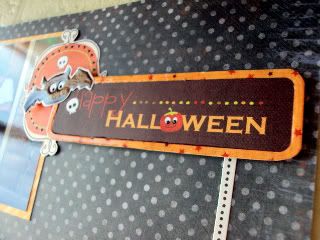
I also added stickles and glossy accents to the bat, but it's hard to see. This pic shows it a little better.

Photobucket


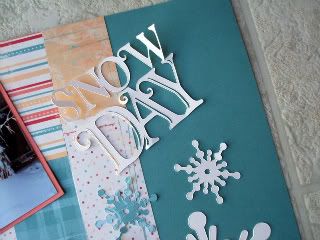
Here is a sneak peek at my other layout. I have the design for it all planned out in my head, I just have to glue the pics down and add my embellishments. The title and snowflakes were cut on the "Winter Woodland" Cricut cartridge. The paper is from Close To My Heart (Key To My Heart paper pack...now on sale b/c it's been discontinued! Find some at http://marianqcreations.myctmh.com/ )

Photobucket

Photobucket

Photobucket

I think I'm going to 'paint' the snowflakes with some Glossy Accents and then stickle the heck out of them. They need to be as sparkly as possible, lol.

I will post pics once I finish it! :)

Wednesday, December 16, 2009

Holiday Crop at Capture!

Join us Friday, Dec. 18th from 6:00pm-11:00pm for an evening of crafting, while enjoying some holiday treats and a good time!

Finish up your holiday craft gifts!  We’ll have lots of great ideas for you to wrap up your holiday shopping!

$15 for the evening.

Call 970-484-0595 or send an email to info@shopcapture.com to reserve a spot.

See you there!

Photobucket

Monday, December 14, 2009

Sugar and Spice baby shower

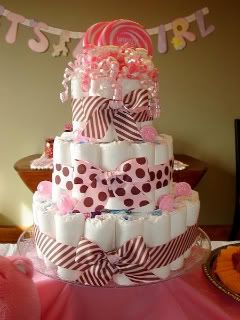
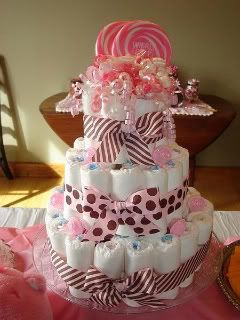
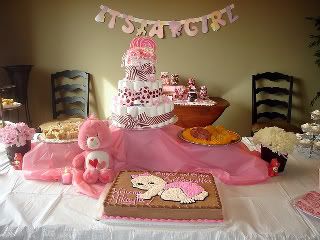
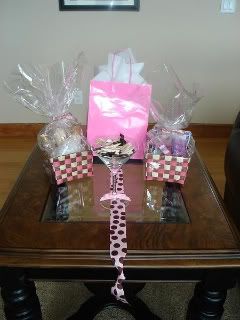
This is a shower I did for my friend last October. She was having a girl and doing the nursery in Care Bears with pink & brown as the color scheme. I knew I wanted to make a diaper cake,and wasn't sure what to put as the 'topper'...until I saw a bunch of giant lollie pops and knew it would be PERFECT! And so the "Sugar and Spice" theme was born.

This is the diaper cake (You can fine eleventy million video tutorials for one on YouTube, but it's basically rolling up each diaper and securing it with a rubber band, then arranging each layer in a circle and securing THAT with a giant rubber band, and then decorating it with ribbon.)

Photobucket

I tucked little goodies inside the cake (Diaper rash ointment, soap, shampoo, gas drops, etc.)

Photobucket

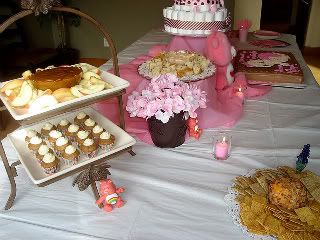
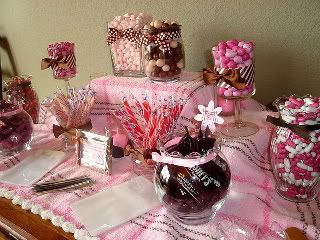
The buffet:

Photobucket

Photobucket

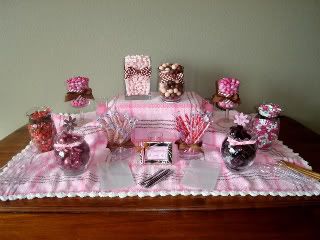
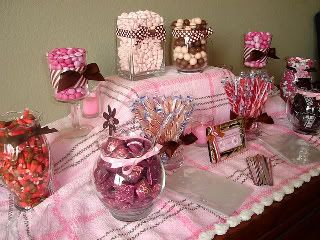
What's a baby shower (or any party for that matter) without a candy buffet?! Plus it fit into the theme so well!

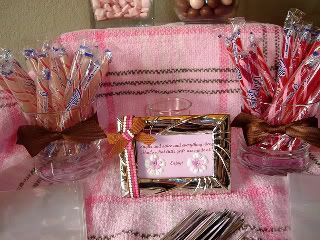
The jars came from a local thrift store and sat on a super soft baby blanket that the mother-to-be took home as an extra gift.

Photobucket
Photobucket

Photobucket

A cute little saying inside a decorated frame... "Sugar and Spice and everything nice, that's what little girls are made of! Enjoy!":

Photobucket

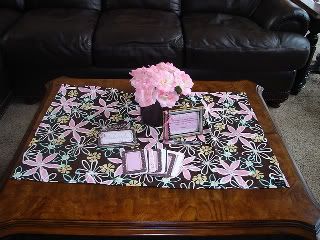
I also made a decorated tin and matching papers, and had each guest write some words of wisdom about parenting for the guest of honor. It's sitting on a nursing cover (another gift to take home!)

Photobucket

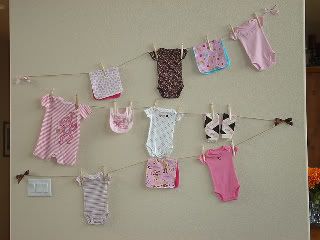
Some more decorations/gifts (onsies, baby legwarmers and custom made burp cloths):

Photobucket

These were the door prizes (and the mini clothespins) for the games we played:

Photobucket

In case you were wondering what the "spice" part of the theme was, we served spiced apple cider, pumpkin muffins w/cream cheese icing, mini spiced pumpkin cheesecakes, and a jalapeno & cheddar dip! ;-) Some of the candy in the candy buffet was also 'spice' themed: clove and cinnamon! Yum!

Thursday, December 10, 2009

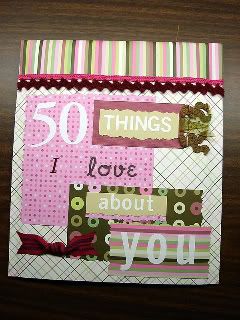
"50 Things I Love About You"

Photobucket
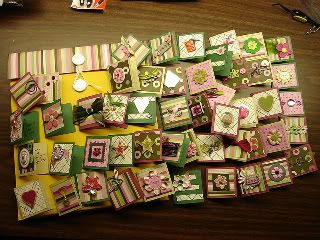
This was a project I made for my mom's 50th birthday, but you could adapt it to any age or occasion. (Maybe a Valentine project for your sweetie based on the number of months/years you've been together? Or an anniversary gift? Or as a Countdown to Christmas? The possibilities are endless!)

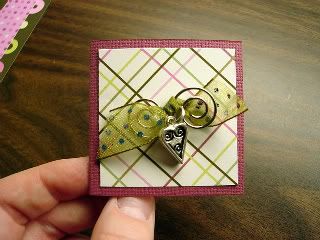
First, I made 50 tiny "cards" measuring 2" x 4". I wanted them to be small enough to put on a couple scrapbook pages, but you could change the dimensions based on your own project.

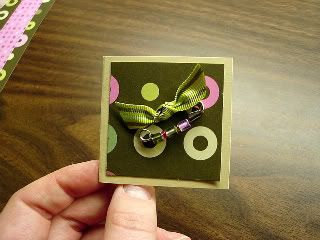
Once I folded them in half, I decorated the front with random scraps of paper and cute little embellishments. Flowers, buttons, brads, rhinestones, charms...... you could stamp them, add glitter, doodle on them, add a rub-on, distress them..... these are just a few of the things you can do to dress these up. (I recommend using either Zots glue dots or a good liquid glue to hold the non-paper items to your cards)

Photobucket

Photobucket
On the inside, I wrote a little note describing 50 different things I love about my mom (one for each card).

Once all 50 were done, I placed them in an envelope that I decorated to match. (Any size envelope would work as long as it holds all your little cards.)

Photobucket

Another variation would be to put them in a decorated box (lots of craft stores sell Chinese take-out boxes in different sizes, or you could get a plain square box and dress it up.....or a decorated tin...or a paint can....lots of things would work!)

I'd love to see everyone's variation on this project if you decide to do one yourself!

:)

Tuesday, December 8, 2009

Birthday Calendar

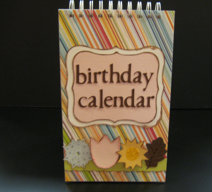
Join me at Capture on Wednesday, Dec. 23rd from 6-9pm to learn how to make this cute birthday calendar!

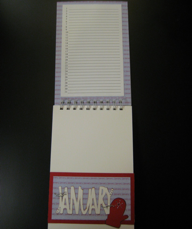
It's a calendar you use year to year! Just write important birthdays, anniversaries or holidays on the chart at the top of each month, and store your ready-to-send cards in the pouch! Never forget to send cards again!

Contact Capture at info@shopcapture.com or call (970)484-0595 to make a reservation. The cost is $30.

They make great gifts!

 http://www.shopcapture.com/Site/Home.html

Photobucket

Photobucket

Monday, December 7, 2009

Paper Stars tutorial

As promised, I'm posting the link to the paper stars tutorial. This is from my friend Amanda's blog (and it's a pretty old post so hopefully this works!)

My only word of advice is to make sure you practice on strips of scrap paper first because it takes a while to get the hang of folding it right. But once you do it's addictive and you'll look for all sorts of ways to use these little cuties! :-)

Enjoy!
http://maytwelfth.com/wedding/?page_id=15

Photobucket

Sunday, December 6, 2009

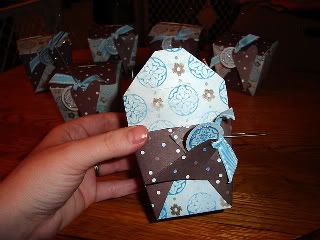
Mini Chinese take out boxes

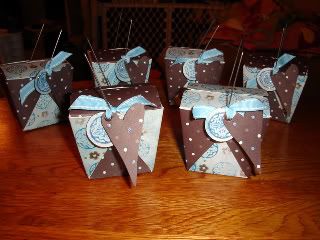
I found these (undecorated) at Hobby Lobby (my FAV. store besides Capture). They came in packs of 6 in white, but I'm pretty sure you can find them in other colors or even transparent!

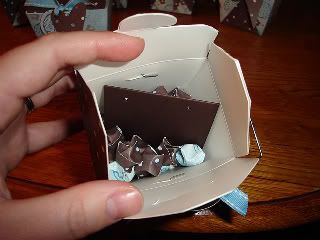
These were made for my friend Evka to give to her bridesmaids at her wedding. They housed a pair of earrings that I made to coordinate with their dresses. I forgot to get pics of the earrings (D'oh!) but pretend they're in there on the little jewelry cards. ;-)

To decorate them, I took one box apart and traced the pieces onto the patterned papers I wanted to use. Then I just cut them out and glued them to each box. That made it easier and there was no measuring! (I hate measuring!)

Photobucket

A close up view: I added glitter to the tags, but glitter doesn't show up well in pics. :(

Photobucket

This pic shows the size (aren't they cute?!)

Photobucket

The inside (I also made those little paper stars as a "filler". I'll post a tutorial on those another time.)

Photobucket
Related Posts with Thumbnails