Friday, February 26, 2010

The Olympics of Stamping: Birthday Card

Hello everyone!

If you haven't seen it yet, Moxie Fab World is having an "Olympics of Stamping" Challenge for Stamp It! Cards Week. It's so exciting! So I decided to play along. :-)

The rules for this challenge were to create a card in the following themes: Birthday, Thank You, Season's Greetings, Hello/Thinking of You, and Love.

You could do just one entry/theme, or you could participate in all five! And the best part is that it coincides with this year's Stamping Royalty Contest! So not only can you participate in The Olympics of Stamping, but you can submit the same cards to Paper Crafts for the Stamping Royalty Contest! Woo-Hoo!

So I just HAD to participate! It's too fun!

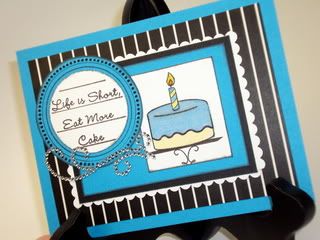
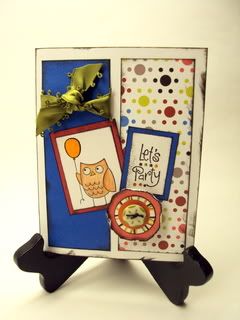
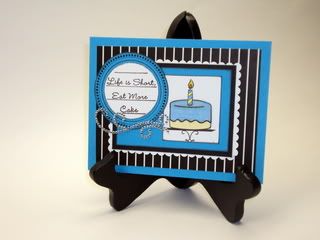
Sooooo, here is my first card. It's for the Birthday category and I'm so excited about it!
Photobucket

Photobucket

Photobucket
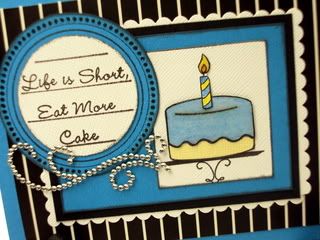
The paper is from DCWV and the stamps are MFT's "Lovin From the Oven", "What's Up Cupcake?" and "Clearly Sentimental About Food" and the journaling circle is from Kaiser Craft's "Journal Blocks" (style # CS705).

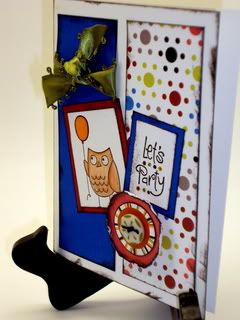
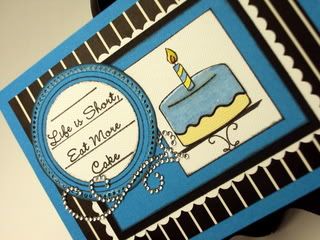
I stamped it in CTMH's Black ink pad and colored it in with various watercolor pencils and a blending pen. Then I made the icing and the flame of the candle shine with Glossy Accents. (I also added it to the dots on the circle stamp.) :) You can *sort of* see it in this pic:
Photobucket

The sparkly swirl is from ZVA Creative.

What do you think?? I love the way it came out. I can't wait to create more cards in all the other categories!

If you would like to participate, the Olympics of Stamping entries must be submitted by March 8th, and the Stamping Royalty Contest submissions must be postmarked by March 24th.

Let me know if you decide to participate! I'd love to see your creations as well! :)

Thanks for looking!

Sunday, February 21, 2010

Crafty Kitty's Weekly Challenge #2

This week it's a double whammy! Not only is this example of mine a challenge for all of MY followers, but it's an entry in the Moxie Fab World's "Fun With Floss" challenge!

This week, my challenge to you is to create a St. Patrick's Day themed card or layout. Simple, no?

But to add to it, I decided to make it a card using embroidery floss as well so I could participate in the Moxie Fab Challenge (my first online challenge entry ever!)

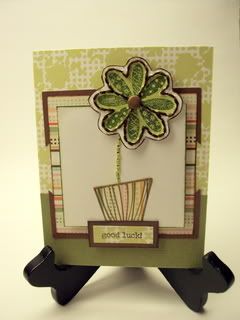
So here is my entry/weekly challenge example:
Photobucket

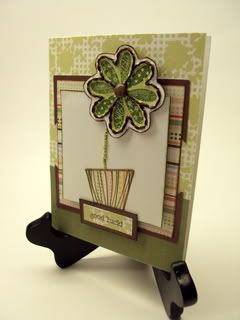
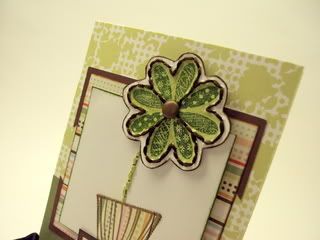
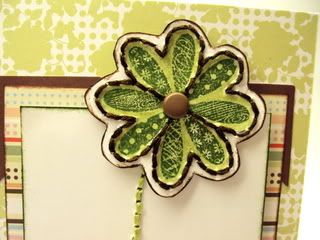
I used THREE different stamp sets (that I will show you in the tutorial to follow) and hand stitched the four leaf clover and stem:
Photobucket

A couple close-up views:

Photobucket

Photobucket

That's it! Just upload your St. Patrick's Day themed card or layout (with or without floss) by Feb. 28th for your chance to win a set of hand crocheted flowers using the Mr. Linky below. (For full contest rules, click here.)

Now for my tutorial:

First off, this Moxie Fab challenge is right up my alley because I've been using embroidery floss for a while making my little flowers for Capture, and I just recently learned how to crochet some little iopd/cell phone cozies. So I am ALL about the stitching & floss and all that great stuff right now.

I didn't actually have the right sized shamrock or 4 leaf clover, so I needed to improvise. I searched through my stash of flower stamps hoping SOMETHING would look shamrock-esque and I found one!

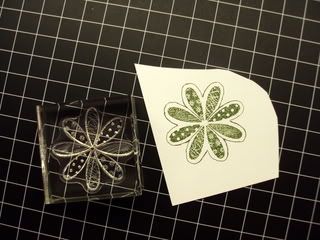
I stamped this flower image (a stamp set I bought at Jo Ann's a long time ago for a dollar) and added the shamrock-y border by hand with a fine tip marker:

Photobucket

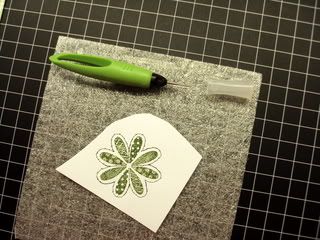
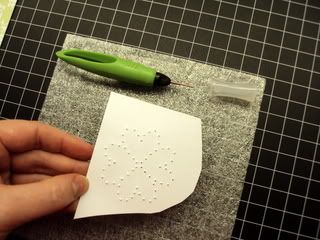
Then I used a paper piercer to punch holes in it:

Photobucket

Photobucket

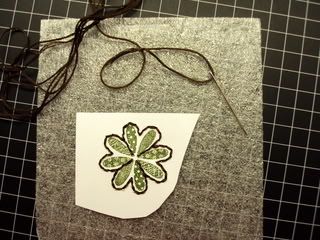
I stitched in some brown embroidery floss with a big needle to complete the "shamrock" look (is it a shamrock or just a 4 leaf clover? What's the difference? Do shamrocks just have the 3 leaves? I don't know. Anyway....:

Photobucket

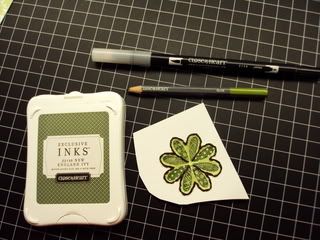
I colored it in with a colored pencil & a blending pen (both from Close To My Heart. Also pictured is the ink pad I used: New England Ivy):

Photobucket

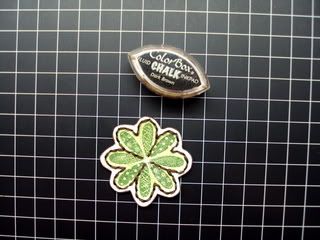
Then I cut it out and inked the edges:
Photobucket

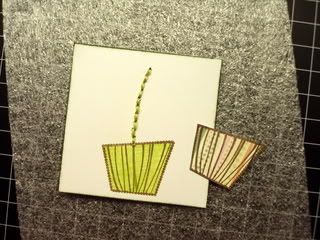
This pic shows the flower pot and "stem" I stamped, paper pieced and stitched. (I was originally going to pop the flower pot up with foam squares, hence the green coloring, but I changed my mind after putting the card together.):

Photobucket

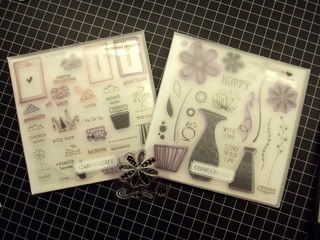
These are the stamp sets I used: So Sweet Seasons, (now retired) With Love, and the nameless one I bought at Jo Ann's dollar section. ;-)

Photobucket

So that's pretty much how I did it. The patterned paper came from Me & My Big Ideas. If you have any questions about it, just ask!

Thanks for looking and be sure to post your entry by Feb. 28th to be eligible to win the crocheted flowers! (and if you use floss in your entry, be sure to participate in the Moxie Fab challenge as well!)


 Click here to enter your work and to see links to the other entries:

Thursday, February 18, 2010

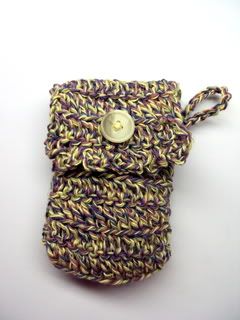
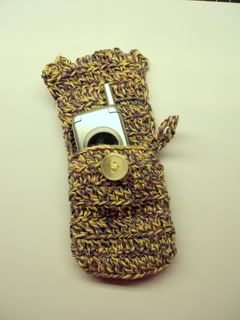
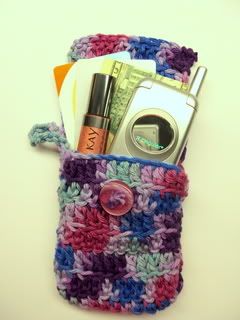
More cell phone/iopd/camera cozies!

I've been practicing these little babies because I want to sell them on Etsy and give them as gifts, so here are my practice ones!

If you're interested in ordering some I can do custom orders. Just email me at craftykitty79@hotmail.com!


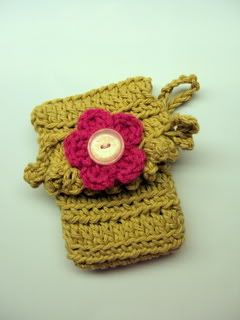
Blue w/flowers & a ruffled edge:
Photobucket

Photobucket

A purple/yellow/green variegated one:

Photobucket

Photobucket

This one is smaller (only the 2nd one I made...I was still working out the pattern) but I love how the flower doubles as the button closure!

Photobucket
Photobucket


Photobucket

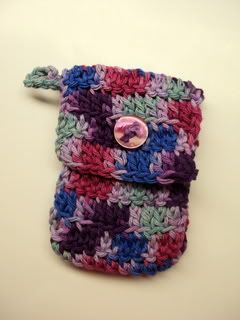
Another variegated pattern:

Photobucket

They hold a ton of stuff!

Photobucket

Thanks for looking!

Tuesday, February 16, 2010

Oh. Em. Geeeee!!! Look what I made!

Ok, so lately I've been crocheting like crazy (mostly little flowers) but I've wanted to branch out a little. I'm not gonna lie, I have NO clue how to read a crochet pattern. My mom taught me one pattern YEARS ago and only recently (thanks to a video tutorial from Little Birdie Secrets) have I learned more patterns.

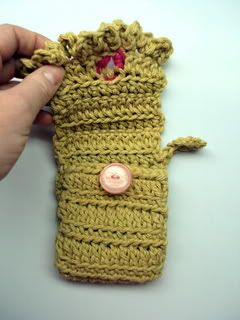
So, after browsing the blog a little more and feeling a bit brave, I decided to try and tackle this ipod/cell phone cozy (scroll down a little. It's after the towel holder.) Only problem was I still didn't know how to read a crochet pattern.

So, after doing a little Googling and watching a little YouTube, I figured out the basics and was able to sort of tackle this pattern.

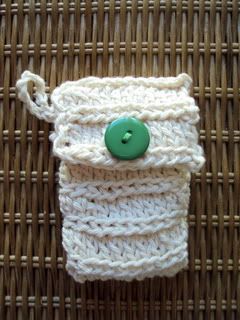
Now, being as lazy as I am, and also not having the right size yarn on hand, I changed the pattern a little bit. Instead of doing a bunch of crossed HDC (crossed half double crochets ) I did alternating rows of half double crochets and regular double crochets.

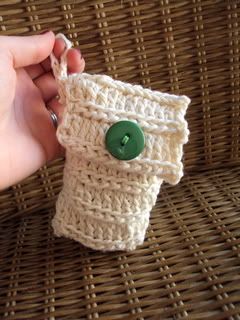
I also added a little loop thingy to it. I felt it needed one. :)

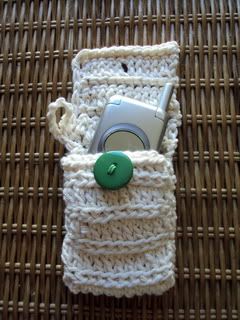
And seeing as how every other row was a double crochet, I didn't need to make a button hole b/c if you know anything about crocheting, you know a row of dc would let you have enough room to slip a button through. :)

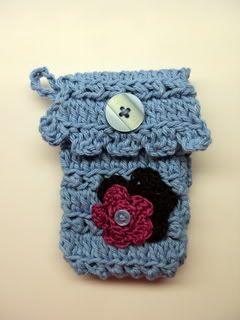
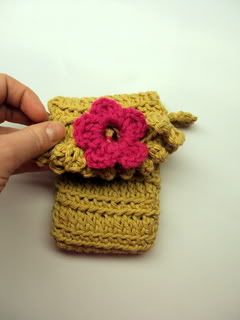
So anyway, here it is! It's certainly not perfect. There is room for improvement. But hey, it's my first one ever! (and only the 4th crochet pattern I've ever attempted!) Not too shabby, IMO.

Photobucket

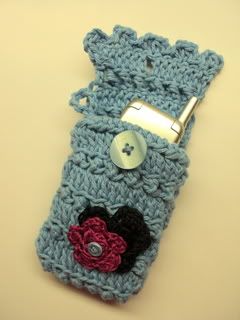
With my cell phone tucked inside:

Photobucket

Closed & hanging from the loop:

Photobucket

I switched and put my camera in it, but I couldn't take a pic of that b/c you can't exactly take a pic of your own camera when you are currently using it, lol.

What do you think? :-D

I'm going to make more in different colors. I might list them on my Etsy shop if I can make them look "professional" enough. ;-)

Thanks for looking!
Sunday, February 14, 2010

Weekly Contest #1

Welcome to Crafty Kitty's very first Weekly Contest!

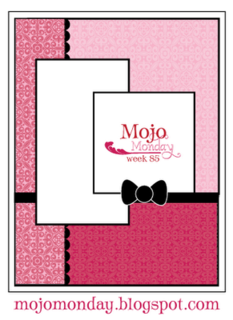
This week's challenge is a sketch from Mojo Monday. The rules are simple: use this sketch as inspiration for making your own original card (or small page layout)and then post a pic of it here using the link below.

You don't have to have a blog to participate. You can upload your pic to any photo hosting website (like Flickr or Photobucket) and then copy & paste the URL for it here.

Since there is a MONTHLY winner instead of a weekly winner, you have until the end of February to participate, however, next Monday a new challenge will be posted. You may participate in as many weekly challenges as you like, but I do ask that you only post ONE entry per challenge.

One winner will be chosen each month out of all the challenges for that month (so February is going to be a short one, lol!)

The winner will be announced in the first challenge posted the following month, so be on the lookout!

Ok, let's get started!

This week's challenge sketch:

Photobucket

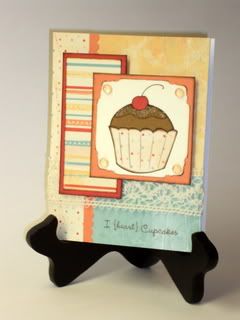
You can find the original Mojo Monday post here for more inspiration, but here is my take on it:

Photobucket

The papers are a retired set from Close To My Heart, and the stamped images, ribbon and Glittered Garnishes (the sparkly round things in the corners) are from My Favorite Things.

Want to know what you're playing for?

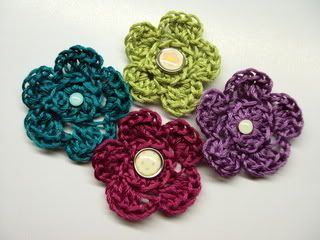
This month's winner will receive a pack of four hand crocheted (by me, TYVM ;) flowers with brads! (The brads are removable, in case you have your own that would match your project better than these do.)

Photobucket

So, get to craftin' and post your pic using the Mr. Linky below, and thanks for playing! :)


Click here to post your work and see the links to the other entries for this challenge:

Thursday, February 11, 2010

Wanna have a contest?!

I'm going to start a weekly contest for my blog! I personally love the Mojo Monday blog, and the weekly contest from Moxie Fab World, "Tuesday Trigger". So I've been inspired to start my own contests (or at least copy these two wonderful blogs until I can come up with something of my own, lol.)

I'm also a fan of Pagemaps and I'll probably pull sketches from that site as well.

So, here is the rundown:

Each week, I'll post a contest. It may be about sketches, use of color, technique, use of product, inspiration....all sorts of things. I'll mix it up. Sometimes it may be about cards, sometimes it might be a page layout. Or sometimes it might just be any paper crafting project you want to submit as long as it follows that week's contest guidelines (like, "use of ribbon" for example).

Each contest will start on a Monday (unless otherwise noted).

It's mostly going to be for fun, so there won't be a "winner" every week, HOWEVER, I'll pick a monthly winner based on all the entries I receive from the contests. (This is because I'll be paying for the prizes out of my own pocket since I don't have any sponsors.)

The prizes will be small but FUN! And I'll most likely announce what the prize will be for the month so you know what you're playing for. (I just have to pick one first, lol!)

To be fair, I will have my husband, and most likely a group of women from an online forum I belong to (that has nothing to do with crafting) help me choose each month's winner.

You don't have to have a blog of your own to participate. You can take a pic of your creation and upload it to any photo hosting site, like Photobucket for example, and just copy and paste the URL for your pic to the link that will be provided in that week's contest.

If this little contest of mine takes off, we might have to adjust the rules a bit, but we'll cross that bridge when we come to it. :) After all, this is just for fun!

If you have any questions or suggestions, please leave me a comment or email me at craftykitty79@hotmail.com.

Who knows what this will lead to, but I always love seeing what people create and how they interpret sketches or techniques. And I hope you'll be inspired by it too!

Tuesday, February 2, 2010

More cards...

Here are some cards I've been working on. I'm thinking of opening an Etsy shop and listing these. :)

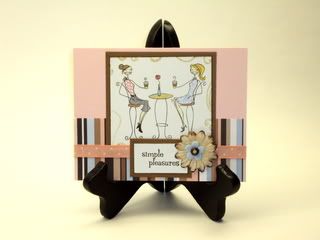
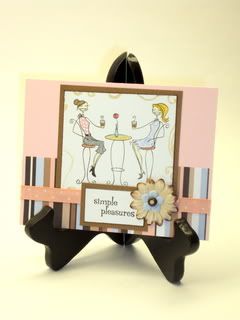
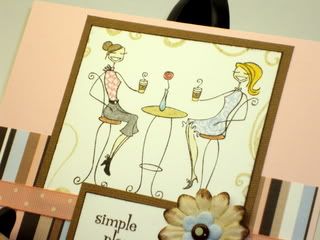
This one uses a stamp set I bought from Stamping Bella. It's called "Javabellas". I paper pieced their outfits. (Not gonna lie, that was a pain in the butt! It's easier on larger stamps. I had to try to find a tiny pattern that would actually show up once I cut it out, and cutting it was tricky too. Not sure I'll go that route again, but it came out cute.)

This card makes me want a latte! It would be the perfect card to stash a coffee gift card in. :)
Photobucket

I inked the edges of the flower and added Glossy Accents to the vase to give it shine.
Photobucket

Photobucket

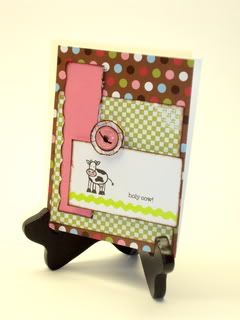
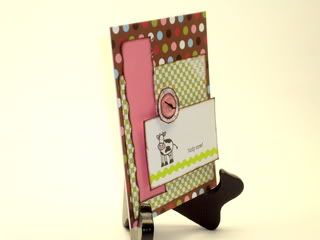
These next two cards use a stamp set from A Muse stamps. It's called "Animal Wishes". (I love anything with animals!)

Photobucket

I popped the stamped piece and the button accent with foam squares. I've been using a LOT of foam squares lately! They are great for adding dimension to cards!
Photobucket

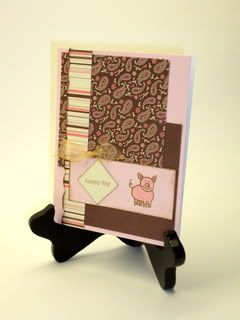
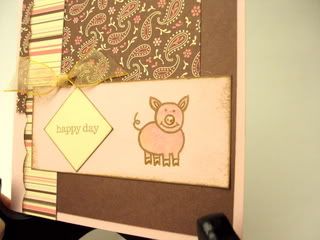
Cute little piggy:

Photobucket

I added Glossy Accents to his nose, ears and feet:
Photobucket

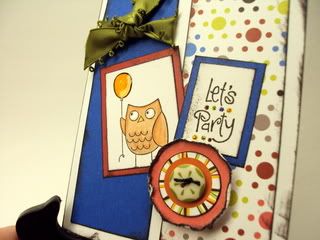
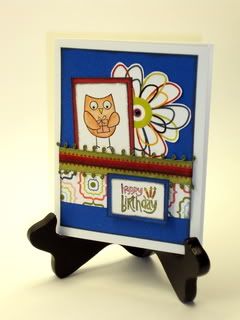
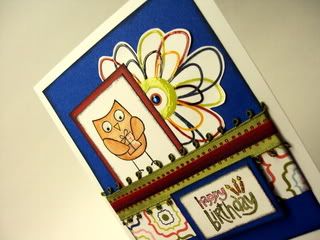
The next two cards use the stamps I bought at Jo Ann's for a dollar. They are becoming my favorite stamps to use! I don't know if it's because birthday cards are so easy and fun to make, or if it's the cute little owls...I do wish they were clear and not rubber mounted (and came in a whole set so I could have more of these cute little guys!)

The sentiments are from a small clear set I bought at Michaels about two years ago. They aren't that great quality-wise (I had to go over it with a black marker after I stamped it) but hey, they are cute and cheap! ;)

Photobucket

Photobucket

I added Glossy Accents to the balloon and his eyes, and I used Stickles on the sentiment.

Photobucket

For this one, I used the Glossy Accents on the flower, his eyes, the present and the candles:

Photobucket
Photobucket


Thanks for looking! :)
Related Posts with Thumbnails